Smart Wallet Onboarding
Once you access your account, you'll be prompted to complete your account information. This includes adding a profile picture, filling out your name, and providing any other relevant details.
Alternatively, you can tap on your profile picture and select "Profile" to access the account information page. From there, you can edit your profile and update any necessary information.

- Finish setting up the account: add your personal information such as name, profile picture, and other optional details.
- Add at least one more social account: link another social account to your Brillion wallet for easy authentication.
- Change name: change your name or username associated with your Brillion wallet.
- Set up Identity Recovery: follow the recovery process to ensure you can recover your account in case of loss or hacking.
- Turn Data Backup On: make sure your data backup is turned on to secure your account.
Next, click on option 1 to begin setting up your account.
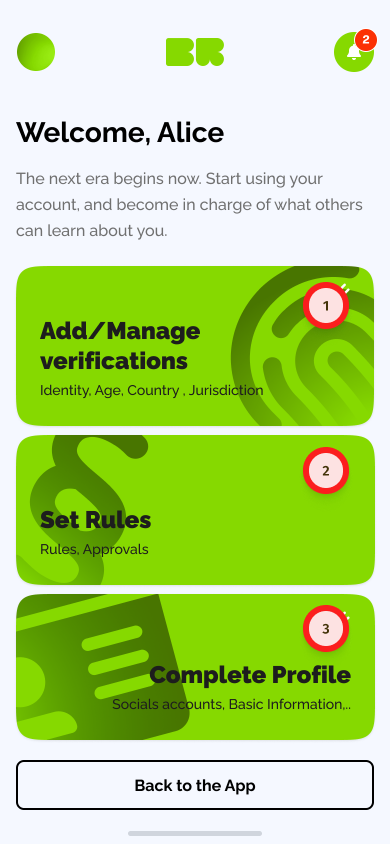
This will lead you to the step by step onboarding process.
- Add Verifications: You can add various types of verifications to your Brillion account, including identity, age, country, and jurisdiction.
- Complete Profile: You can complete your profile on Brillion by adding necessary documents, address, and personal information.
- Set Rules: You can set rules and approvals to ensure that transactions on Brillion are secure and adhere to your requirements, such as approval processes for outgoing transactions or setting transaction limits.
If no KYC process has been completed yet, options 1 and 2 will take you to the KYC process. If you are here for the first time, you will most likely be prompted to complete it.
Starting your KYC journey
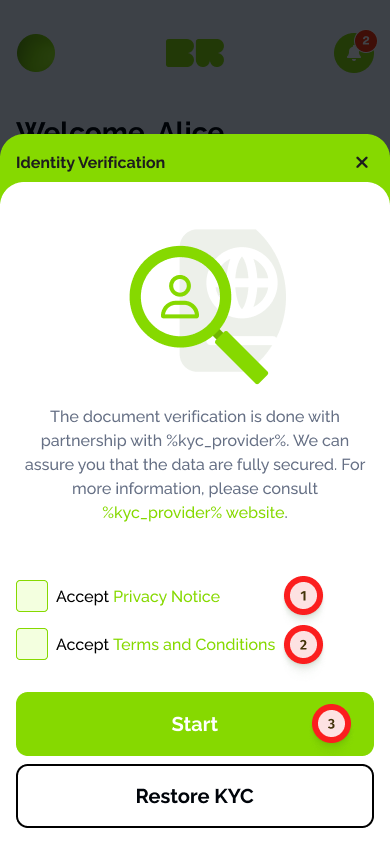
- Before proceeding, make sure to carefully read and accept the Privacy Notice.
- Similarly, also remember to read and accept the Terms and Conditions.
- Once you have reviewed and accepted these agreements, click on the Start button to begin using Brillion.
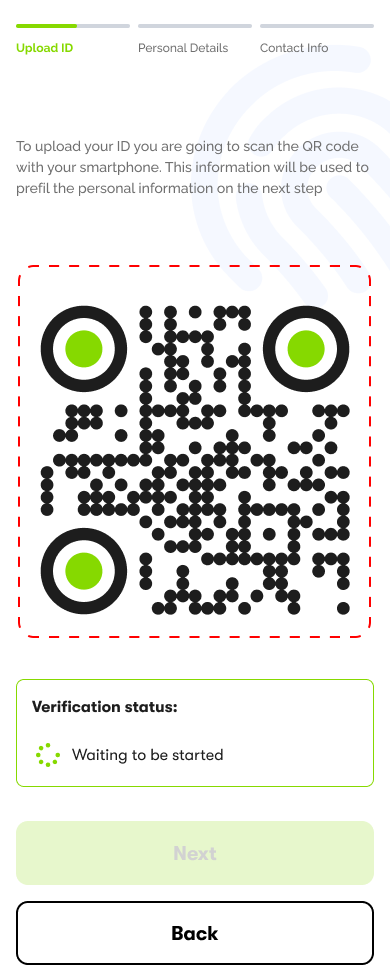
If you're accessing Brillion on a desktop, you'll be prompted to scan a QR code to continue the KYC process on your phone. This ensures a seamless and secure verification process, where you can easily provide the required information and documents.
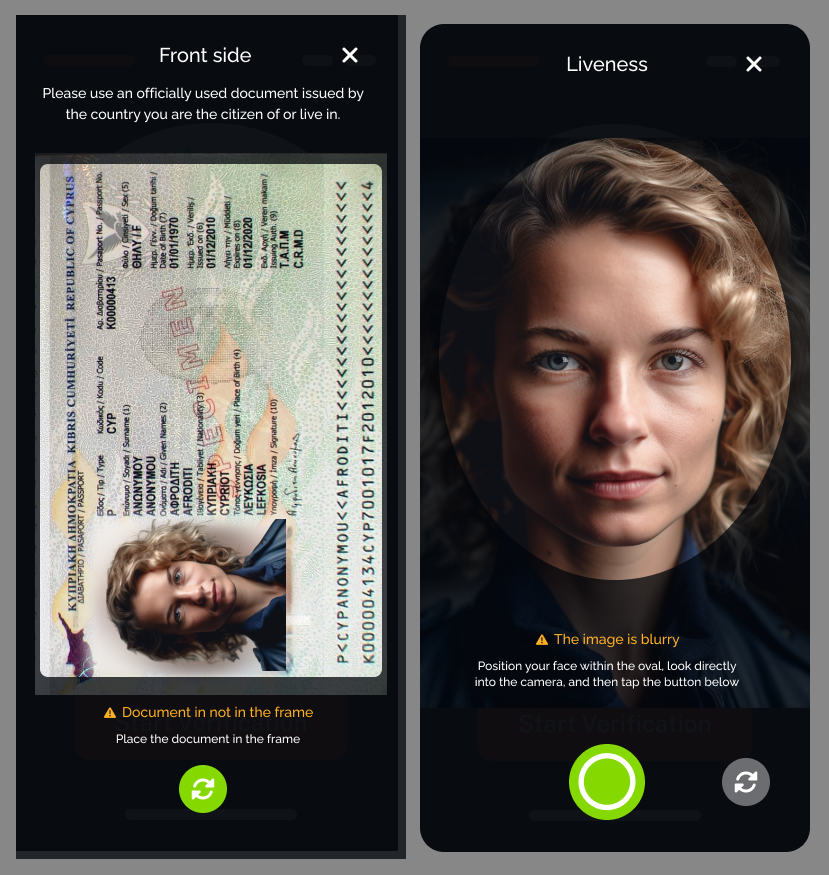
After completing the KYC process by uploading your ID and selfie, you will be prompted to fill out your personal information, including your name, date of birth, and address. Make sure to provide accurate information, as this will be used to verify your identity and comply with any applicable regulations. Once you have filled out your information, you will be ready to use your Brillion Wallet and access its various features.
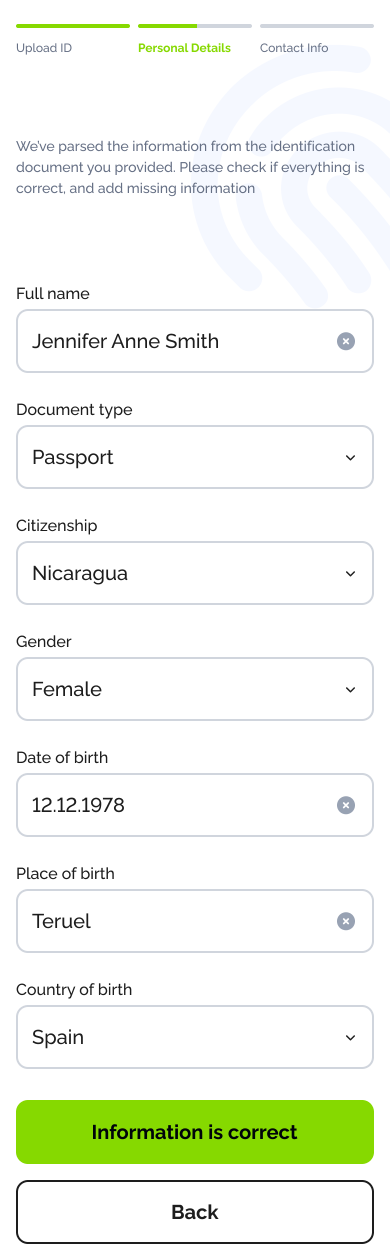
Input your personal data:
- Name.
- Document type.
- Citizenship.
- Gender.
- Date of Birth.
- Place of Birth.
- Country of Birth.

Then proceed to fill your contact information:
- Country.
- Address.
When you are done, send for verification and wait for the process to finish.
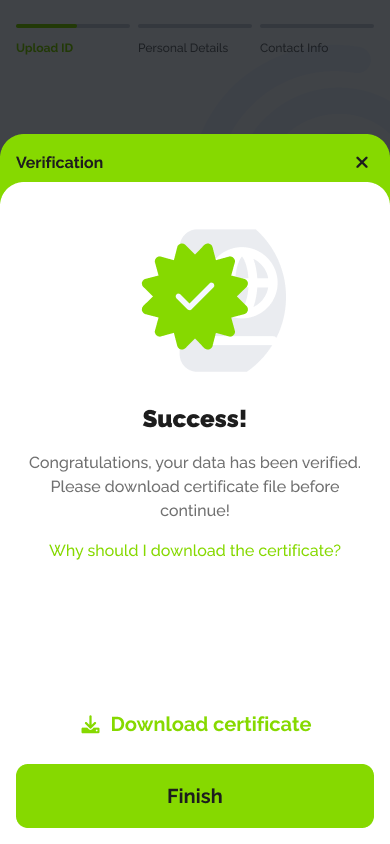
Once you've completed the KYC process and your identity has been verified, don't forget to download your certificate for future reference. You can do this by clicking on the "Download Certificate" button, which should be located on the final screen of the KYC process.
GBG and Nexera DO NOT STORE ANY OF YOUR DATA. Your encrypted Summary is stored in your web browser as long as you do not delete your browser data for this site. If this data is lost, you will need to restart the KYC process
Verifications
Now that the KYC process has been completed, you can generate Zero-Knowledge (ZK) proofs for each of the verifications provided by Brillion. ZK proofs provide a way to prove that you have a certain attribute, such as age or nationality, without revealing any additional information beyond what is necessary to prove that attribute. These are the certificates you can generate:
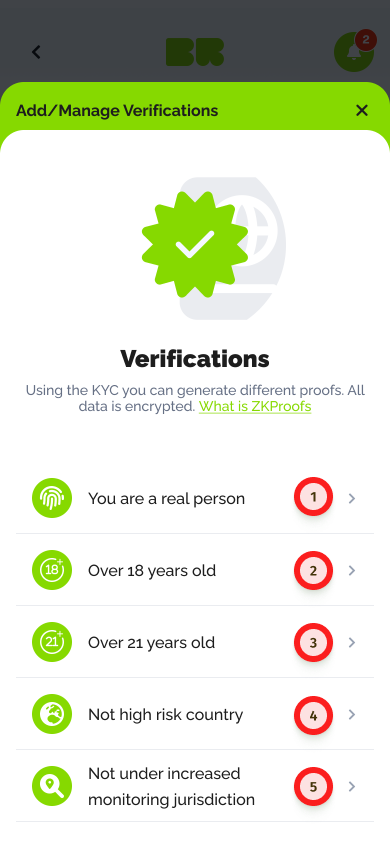
- You are a real person.
- Over 18 years old.
- Over 21 years old.
- Not high risk country.
- Not under increased monitoring jurisdiction.
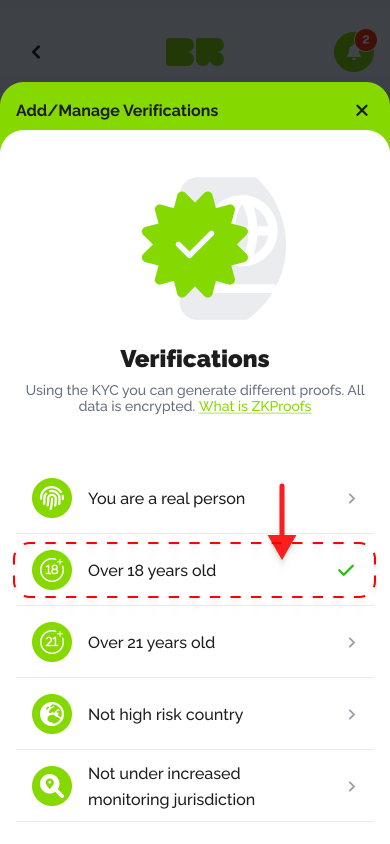
To generate a ZK proof for each verification, first select the KYC process you completed for that verification. Then click on "publish" to submit the verification and generate a ZK proof. This proof allows you to securely and privately share your verified information with third parties without disclosing any sensitive personal data.
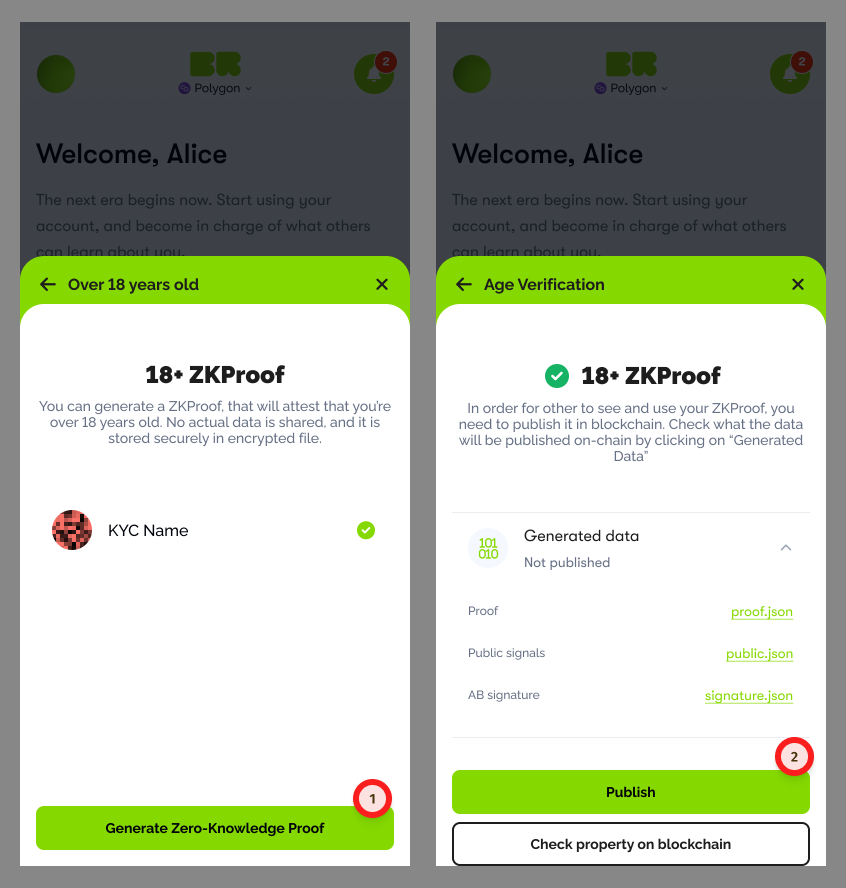
Once you generate a proof for a verification, you'll see it checked as completed.
Recovery
Additionally, when you first open the app, you will notice that you're prompted to protect your wallet.

This takes you to the Recovery setup, which you can consult it here.